Tuesday, June 11, 2019

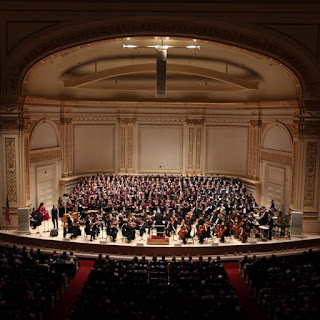
How DO you get to Carnegie Hall?

There's an old Vaudeville era joke that goes something like this ...

A symphony conductor was late to a performance, and he was running quickly up 7th Avenue in New York City to make up some time. A tourist saw him in his tuxedo, baton in hand, and, assuming he was on his way to the famous concert venue, asked, "Excuse me, how do you get to Carnegie Hall?"

Without missing a beat, the out-of-breath conductor hollered, "Practice!"

Oh, how much wisdom is imparted in this simple joke. Just as a musician can only rise to a level to perform in a premiere symphony arena such as Carnegie Hall if he or she improved his or her skills through practice, the skills to perform any hobby improve with a similar application. That goes for anything. Painting, woodworking, gardening or archery. If you want to get better at it, you have to put time into it. There really are no shortcuts.
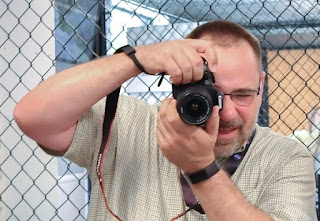
The beautiful thing about photography - especially digital photography - is there is little cost to practice after an initial outlay of money for equipment. For most of us, we already have perfectly capable cameras included in our cell phones. If you are looking for something with more flexibility, it costs little to pick up a used camera from a friend who is upgrading or a refurbished model from someplace online. It costs nothing for photos to be developed, so it's OK to take risks and try different shots. And, with social media, email and other photo sharing services, it costs nothing to share the results of your practice with friends, family and others.

By practicing photography, you will start to notice more about the world around you. That interesting architectural detail on the building you walk by every day. The flowering shrub in the backyard with the amazing colors that come out only once a year. The smiles of the important people in your life as they go about their daily routines.  That stunning sunrise that seems to happen once in a lifetime. Each of these will start to jump out at you, and you may find yourself reaching for your camera to get a shot so you can recall the moment days, months or years from now.

Photography also allows others to see the world how you see it, giving them valuable insight into your life. I always get a thrill when someone comes to my house and asks where a particular photo hanging on my wall was taken, or how I got such a unique view of the subject.

It was Rod Stewart who famously sang that, "every picture tells a story, don't it?" 

He wasn't kidding. 

Does practicing photography mean you will become a rich and successful fashion photographer working the runways at Milan? An adventure photographer snapping photos deep in the Amazon rain forest for National Geographic?

No more than taking the time to practice on a violin will get you into the orchestra playing at Carnegie Hall.

What it will do will give you the skill set to enjoy your time at the shutter button, developing memories along the way.

Capture and enjoy every single one of them.


Friday, June 7, 2019

After the Fact

Taking photographs is an exercise in capturing fleeting moments onto film or - in today's modern cameras - as a digital file. Sometimes, everything lines up perfectly and blam - you have a masterpiece, ready to enlarge, frame and hang in your living room.

An old-fashioned darkroom
Then, there is reality. There are times when your shots come out underexposed. Or, maybe the colors didn't come out exactly as you wanted them to look. Or, you captured too much in your image, and your shot composition is off. 

Now what?

During the days of shooting on film, there were options you could pursue, and many of those either involved an intricate knowledge of how to manipulate the photo negatives in a dedicated darkroom and an artistic eye. Oh, and a lot of money to get the images developed.

With today's digital cameras, manipulation of the image after the fact is not only easy, but your options are nearly limitless.

The big kahuna of photo manipulation software is Adobe's Photoshop, the industry standard since its introduction in 1988. Not only does the software allow for basic cropping, sharpening of blurry images and color correction; the tools used in Photoshop can be used to create incredible works of art in their own right.

While Photoshop is powerful, it also has a lot of  tools the average photographer may never use. Plus, that heavy price tag ... wow.  Adobe also offers other programs at different price points - such as Photoshop Elements or Lightroom, which offer a more limited, yet still powerful, suite of photo manipulation tools at a much more reasonable price.  

And, if you want a free app to do your photo manipulation, you can always do worse that GIMP, the GNU Image Manipulation Program. First released in 1995, this free program tackles many of the same tasks that the more expensive programs handle across all computing platforms.

If you are looking to dip your toe into the world of photo manipulation, this is a great place to start.

Photo manipulation isn't just the realm of desktop computers. There are dozens of free and paid apps for both Android and iPhone platforms which can help you get the best image possible. From familiar apps such as Adobe Lightroom, which can tackle basic image processing to more specialized apps such as Foodie which will make the photos of your gourmet dinner stand out and Visage, which you can use to perfect portrait shots you take of your friends.

The fun part about shooting digital photographs is that you have the ability to manipulate them from the comfort of your own living room. Your full-color digital camera can turn your images into moody black and whites, charcoal or pencil drawings, pastel-toned works of art or hundreds of other looks simply with the click of a button.

You can even select specific colors to bring out from a particular image, such as the eyes on my feline friend here, so they stand out against the black and white.

The ideas are limitless.


Thursday, June 6, 2019

Reflections of ...

Being a child born in the 1960's has been an interesting experience. For instance, I discovered that the week I was born, Billboard's number one song in America was Love Child by Diana Ross and the Supremes.

Hooray.

Had I been born a few days earlier, it would have been the Beatles' Hey Jude, or a few days later, and it would have been I Heard it Through the Grapevine by Marvin Gaye.

It's not that I don't like Ms. Ross and her band. No, it's that I like other songs they did better than that one. Specifically the song Reflections, which was released in 1967. There's something catchier in the beat. I like the lyrics better.

Plus, I love to shoot photos of reflections!

There's something about shooting reflections of subjects that gives them depth. A different look. An interesting symmetry.

For instance, take a look at this photo I took early in the morning across a lake. In the still water, the homes and foliage are reflected in the early morning light. It creates an interesting horizon line which copies the colors and lines of the primary image, making the photo seem a lot deeper. The best way to get an image like this is to find the time of the day when the wind is at their lightest, which typically means that you will be looking to shoot early in the morning. Once winds pick up and the waves start to build, you won't be able to get the reflections on the water.

Smooth water isn't the only time you can get good reflections. Even if you have choppy water such as is found in Tampa Bay, there are plenty of opportunities to get great reflection shots. I took this image before the start of a lighted boat parade in St. Petersburg. Here you can see the reflections of the holiday lights shimmering on the water in the boat slip. Not only does the topside of the boat look festive, but those reflections look great as well. The funniest thing about this shot is that I didn't realize what I had until I downloaded the images to my computer and opened them up to look at them on the bigger screen.

Water isn't the only reflective surface you can use. When Scott Kelby shoots wedding photos, he routinely places the bride and groom's wedding rings on the top of a shiny black piano surface. Those look sharp!

Buildings with windows in them can also capture awesome looking reflections. On an architecture boat trip I took in Chicago, the older, more ornate buildings in the city's skyline were reflected in the modern skyscrapers' window, creating a fascinating cityscape.

And, let's not forget about mirrors. Looking over the shoulder of someone gazing at their reflection in a mirror can capture a golden moment. If you do this, try opening your camera's aperture and focusing on the reflection, throwing the image of the subject out of focus. It will make for a more interesting photo.

Just remember, however, that if a surface is reflective, it can show you - the photographer - in the shot as well! It's best to shoot these images off to the side a bit and triple check your viewfinder to ensure you are not in the shot. Trust me, I have ruined more than my share of shots this way!


Monday, June 3, 2019

Saving and Sharing is Caring


I have several relatives who are a bit older, who love to use their digital cameras. Honestly, they think they are the greatest thing since sliced bread. You will see them at every single family event, camera in hand, snapping away to capture every single precious moment.

I know this because every so often, I am told about these events. And, these relatives bring out their digital cameras, turn on the LCD display, and proceed to scroll through hundreds of photos they have taken to show me the right ones.

Google Photo's screen
Wow. That’s some risky behavior right there. What would happen if the camera or the storage card got damaged?  What happens should the camera get stolen? And, what happens if they wanted to send that photo to someone else?  Do they cart that camera over to their friend's house to show them on that tiny LCD screen?

Fortunately, the same age that brings us digital cameras also brings us easy ways to save and share those photos with friends and loved ones around the world.

If you take your photos with your cell phone, backing them up couldn’t be easier. Both Google Photos and Apple Photos can be configured to automatically take the shots from your camera and upload them to cloud storage. If something happens to your phone, don’t worry, the photos will still be there.

Don't ask me how I know this ...

There are free and fee-based services, but on my Galaxy S9, Google Photo has yet to cost me a dime, and I can go way back to photos from five or six years ago with no problem.

The photo app on my home computer
If you are using a digital camera that isn't your cell phone, it’s a great idea to transfer your photos to your computer as soon as is feasible. Most models allow you to connect a USB cable between your camera and your computer. From there, you can import all of the photos to your computer’s photo file. Most computers running relatively new operating systems also sort the images by the month and year they were shot, and have other cool features such as facial recognition. This way, if you want to see all of the photos of your crazy Aunt Louise, you can do so in a flash.

Backing up your computer isn’t a bad idea either. Terabyte-sized drives can be had for a song these days at big box stores or online. Simply plugging the drive into your computer will allow all of the data – photos included – to be backed up in case anything happens to your main drive. This way, you can restore everything on your new drive, or on a new computer, without any hassle.

If you want to back up to the cloud on your computer, you are in luck, too. Services such as Google Photos and iCloud Photos also work from your computer – PC or Mac – or you can go with a different service such as Shutterfly. There, not only can you back up enormous numbers of photos, you can also create virtual photo albums to share with others. You can order prints or enlargements of images that catch your eye. In my living room, I have decorated with about a dozen photos I have taken from different landmarks, and they look great. Plus, each is its own personal story, so you can not only impress your guests with your skills, but the tales of how you managed to get the shot in the first place. 

When you really want to share your images far and wide, social media platforms such as Twitter, Facebook and Pinterest can do the job admirably. The real king of photo sharing, however, has to be Instagram. It is set up where you can post photos and put brief captions under each. Because each of these platforms is so flexible, you can post to your account, and have it populate across the others. This is a great way to share your photos with groups from within your family, around the block or across the world.

That’s a whole lot easier than looking at a small, vulnerable LCD screen held in someone’s hands.

Sunday, June 2, 2019

You Have My Interest


Photo by Bob Lasher ©
One of my best friends, a guy named Bob Lasher, is an amazing photographer. He has a sweet camera setup, a great eye for composition and hard drives full of museum quality images. There are some nights I will visit his family for dinner at his home, and while we are eating, he has his computer displaying his images on the TV while we eat. Each image outdoing the last.

I eventually had to ask him how he got so many amazing pictures. He looked at me as if I had grown a second head or a third eye and gave me the ultimate head-slapper of an answer. "I point the camera at things that look interesting and snap away." As you can see from this photo he took from the Amalfi Coast in Italy on a recent vacation, it would be just about impossible to take a bad photo with this kind of subject in front of your lens.

It sounds so elementary, but that really is the key to getting interesting shots. If you fill the viewfinder with an interesting subject, the resulting image is going to look interesting.

I put this into practice one autumn a few years back while visiting my dad's house in northern New Jersey. It started as an overcast October day, and after my first cup of coffee, we decided that it would be fun if we headed out to pick apples. Yes, I was nearly 50 years old at the time and I can get as many apples as I wanted at my local grocery store, but something about that trip sounded so appealing. 

First, though, I looked out the sliding glass door onto the lake neighboring his house. While the color in the trees wasn't spectacular due to a drought, it was the first time I had seen autumn color in years. The reds and oranges in the leaves took my breath away, so I had to snap a shot. It wasn't until later that I realized that the reflection on the water helped to enhance the look. A keeper!

My dad, stepmom, older brother and I piled into my rental car, and off we went into the extreme northwestern part of the state to a place called Windy Brow Farms. There, we
 could each buy a bag, head to the orchard and pick our own apples fresh from the tree. 

While we were waiting for the tractor to come pick us up for the ride to the orchards, I took out my camera and snapped a shot of an interesting barn door. It was rustic, green and flaking, and it contrasted with the white board siding. 

What really stood out on this one was the texture of the paint. The vines growing up the side wall. The balance of the shot.  Another keeper!

After we picked more apples than we could possibly use in a month, we headed back to the barn to enjoy a cider donut sundae with maple bacon ice cream - Don't Judge!  That's where  I noticed signs identifying which varieties of apples were available for purchase. 

I started snapping a few shots of the signs, to help us identify how a Northern Spy was different from a Jonagold. That's when I stopped looking at the small signs and took in the entire image. Bushels of brightly-colored apples in the barn. I backed up, set my camera, and took the shot. To this day, that photo takes me back to the exact moment I snapped the image.  I can almost taste the crisp, tart apples and smell the heady aroma. 

That's exactly what an interesting photograph can do for you. And, all it takes to get an interesting photograph is to keep your eyes open and see what inspires you. 

Wednesday, May 29, 2019

Shooting in the Dark


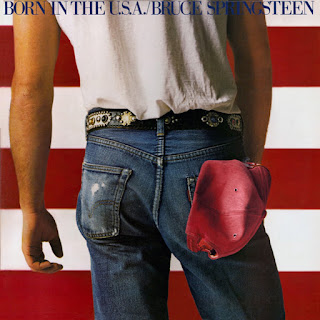
The first concert I ever attended was a real doozie. Bruce Springsteen and the E Street Band during the Born in the USA tour. Floor seats at Giant’s Stadium in the Meadowlands. In New Jersey, the Boss’ home state.

It was one for the ages. He played his classics such as Thunder Road, Tenth Avenue Freeze Out and The River. He also played his new stuff, including the album's title track, Cover Me and Dancing in the Dark. 

Since the concert was at night, the stage was lit up from end to end. The music blared. Everyone wanted to capture that moment on the cameras they were allowed to bring into the stadium. A lot of people way back in row ZZ clicked furiously with their camera flashes popping away.

Boy, were they going to be disappointed with the results of their shots. Why would that be? Isn’t that the reason why camera flashes are installed in the first place, to get shots in dark situations?

Well, yes and no.

For my friends at the concert, they needed to realize that their camera’s onboard flash is really only good for about 10 to 12 feet, so trying to shoot the stage at that concert was really just going to light up the backs of the heads of the people sitting in front of them. This image from the Digital Photography Forum, illustrates just how quickly the flash falls off in a dark room. There is no chance that flash was going to make it to the stage.

Also, in modern cameras, when the flash is activated, the camera adjusts to make the sensor less sensitive, since the subject will be flooded with light from the flash. The stage will look more subdued, and the image quality will suffer.

Plus, your flash? It’s annoying to everyone around you! Many concerts and museums won’t allow you to use it.

Higher ISO settings are more light sensitive
So, how do you get low-light shots without a flash? To accomplish this, we come back to the settings on the camera to allow it to become more sensitive to light. As I had written about before, adjusting the shutter speed to something slower and aperture size to something larger, you can get some awesome shots in the dark.

Another setting I didn’t mention is the sensor’s ISO or film speed. This is a number that is given from 100 all the way up through several tens of thousands. The higher the number, the more sensitive the sensor – or the film, back in the day – is to light. Unlike film, where you had to shoot an entire roll of a particular speed film, your digital camera’s sensor adjusts to the light situation, allowing you to get more out of a dark image when the image calls for it.

The image I am really proud of is this one. I was visiting my father at his home in northern New Jersey around the time of his birthday in late January of this year. It happens that our trip coincided with the full moon as well as the lunar eclipse on the 21st. Earlier in the day, there was mix of rain and snow, but as night fell, the skies cleared and the temperatures plummeted. Once the moonlight fell on the snow, I realized I wanted to get a shot of what I saw out of his window. Without a tripod, I steadied the camera on a stack of books and took this shot.

The camera was in automatic mode, but it realized that I was attempting to shoot a very dim subject using only the moonlight. The results were so impressive, I had this one enlarged and it is hanging in my living room.

As a rookie photographer, it’s a great idea for you to try your hand at shooting under different lighting conditions and see what you can accomplish. You never know what you will have until you take that picture.

Sunday, May 26, 2019

Compose Yourself


Yes, that's me in 1969
Now that we have talked about gear for a while, it’s time to take a quick break to talk about the basics of technique when it comes to taking a photograph.

Back in the days of me and my 110mm camera, I would simply point the lens in the general direction of what I wanted to shoot, press the shutter release and live with the results. For 99 percent of the population who take photos, there’s nothing wrong with that. At all. It’s called taking a snapshot, and that’s part of the reason why cameras were invented in the first place. My baby album is filled with snapshots of me as a little tyke, and I don’t think that any of them would win a prize. I wouldn't trade any of them for the world. 

If you plan on taking more artistic photographs, however, simply snapping away isn’t going to do it for you. You will want to learn the basics of what is known as shot composition.

There is a little bit of science that goes along with this. Our eyes don’t necessarily gravitate to the middle of an image – be it a painting, designed document or photograph. We tend to scan parts of the image first before we look at the middle of the image. This was noted back in 1797 by art critic John Thomas Smith, who first coined the term the Rule of Thirds.

As you can see by this illustration, the naturally eye flows to these four points on your photo. So, if you have a point you want to emphasize, you can put it right on one of those intersection points. Say, a person’s eye or a striking feature of a building. Instead of just shooting a face, you put that face off to one side of the photo, allowing for the subject to interact with the scene.

You don’t even need to necessarily use the points. If you are looking at a gorgeous sky, put the horizon line at that bottom third line in the frame, and click away. If the sky is boring, but the foreground is amazing, put the horizon one third from the top.

How do you know where these marks are on your camera? Many allow you to turn on a grid that projects onto your camera’s LCD screen, making lining up she shot easy.  And, if you misplace the shot in the shutter, you can always use a photo manipulation program on your computer to get it cropped down to look good.

Another trick used by photographers is to think near, mid and far. Taking a photo of a large building or a mountain is awesome but shooting something or someone in the foreground gives your photo a real sense of depth. That’s why a lot of photographers I have spoken to through the years have advised me to shoot my shots very wide – not zoomed in too tightly on the subject. This way, I can always crop out what I don’t need after the fact.

In this example, my good – and photogenic – friend Joe Farago posed for me on the terrace of a hotel in Phoenix, Arizona. With Joe in the foreground, I was able to give the background a little bit more emphasis so show just how grand it truly is.

The key to getting great photography is to continue to practice as much as you can. Experiment. Soon, you will get a feel for shot composition, and it will come as second nature.