Wednesday, May 29, 2019

Shooting in the Dark


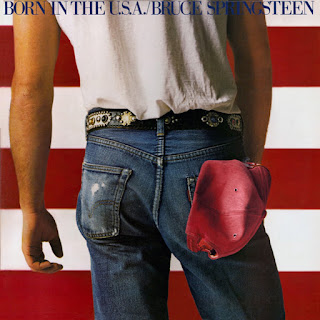
The first concert I ever attended was a real doozie. Bruce Springsteen and the E Street Band during the Born in the USA tour. Floor seats at Giant’s Stadium in the Meadowlands. In New Jersey, the Boss’ home state.

It was one for the ages. He played his classics such as Thunder Road, Tenth Avenue Freeze Out and The River. He also played his new stuff, including the album's title track, Cover Me and Dancing in the Dark. 

Since the concert was at night, the stage was lit up from end to end. The music blared. Everyone wanted to capture that moment on the cameras they were allowed to bring into the stadium. A lot of people way back in row ZZ clicked furiously with their camera flashes popping away.

Boy, were they going to be disappointed with the results of their shots. Why would that be? Isn’t that the reason why camera flashes are installed in the first place, to get shots in dark situations?

Well, yes and no.

For my friends at the concert, they needed to realize that their camera’s onboard flash is really only good for about 10 to 12 feet, so trying to shoot the stage at that concert was really just going to light up the backs of the heads of the people sitting in front of them. This image from the Digital Photography Forum, illustrates just how quickly the flash falls off in a dark room. There is no chance that flash was going to make it to the stage.

Also, in modern cameras, when the flash is activated, the camera adjusts to make the sensor less sensitive, since the subject will be flooded with light from the flash. The stage will look more subdued, and the image quality will suffer.

Plus, your flash? It’s annoying to everyone around you! Many concerts and museums won’t allow you to use it.

Higher ISO settings are more light sensitive
So, how do you get low-light shots without a flash? To accomplish this, we come back to the settings on the camera to allow it to become more sensitive to light. As I had written about before, adjusting the shutter speed to something slower and aperture size to something larger, you can get some awesome shots in the dark.

Another setting I didn’t mention is the sensor’s ISO or film speed. This is a number that is given from 100 all the way up through several tens of thousands. The higher the number, the more sensitive the sensor – or the film, back in the day – is to light. Unlike film, where you had to shoot an entire roll of a particular speed film, your digital camera’s sensor adjusts to the light situation, allowing you to get more out of a dark image when the image calls for it.

The image I am really proud of is this one. I was visiting my father at his home in northern New Jersey around the time of his birthday in late January of this year. It happens that our trip coincided with the full moon as well as the lunar eclipse on the 21st. Earlier in the day, there was mix of rain and snow, but as night fell, the skies cleared and the temperatures plummeted. Once the moonlight fell on the snow, I realized I wanted to get a shot of what I saw out of his window. Without a tripod, I steadied the camera on a stack of books and took this shot.

The camera was in automatic mode, but it realized that I was attempting to shoot a very dim subject using only the moonlight. The results were so impressive, I had this one enlarged and it is hanging in my living room.

As a rookie photographer, it’s a great idea for you to try your hand at shooting under different lighting conditions and see what you can accomplish. You never know what you will have until you take that picture.
Sunday, May 26, 2019

Compose Yourself


Yes, that's me in 1969
Now that we have talked about gear for a while, it’s time to take a quick break to talk about the basics of technique when it comes to taking a photograph.

Back in the days of me and my 110mm camera, I would simply point the lens in the general direction of what I wanted to shoot, press the shutter release and live with the results. For 99 percent of the population who take photos, there’s nothing wrong with that. At all. It’s called taking a snapshot, and that’s part of the reason why cameras were invented in the first place. My baby album is filled with snapshots of me as a little tyke, and I don’t think that any of them would win a prize. I wouldn't trade any of them for the world. 

If you plan on taking more artistic photographs, however, simply snapping away isn’t going to do it for you. You will want to learn the basics of what is known as shot composition.

There is a little bit of science that goes along with this. Our eyes don’t necessarily gravitate to the middle of an image – be it a painting, designed document or photograph. We tend to scan parts of the image first before we look at the middle of the image. This was noted back in 1797 by art critic John Thomas Smith, who first coined the term the Rule of Thirds.

As you can see by this illustration, the naturally eye flows to these four points on your photo. So, if you have a point you want to emphasize, you can put it right on one of those intersection points. Say, a person’s eye or a striking feature of a building. Instead of just shooting a face, you put that face off to one side of the photo, allowing for the subject to interact with the scene.

You don’t even need to necessarily use the points. If you are looking at a gorgeous sky, put the horizon line at that bottom third line in the frame, and click away. If the sky is boring, but the foreground is amazing, put the horizon one third from the top.

How do you know where these marks are on your camera? Many allow you to turn on a grid that projects onto your camera’s LCD screen, making lining up she shot easy.  And, if you misplace the shot in the shutter, you can always use a photo manipulation program on your computer to get it cropped down to look good.

Another trick used by photographers is to think near, mid and far. Taking a photo of a large building or a mountain is awesome but shooting something or someone in the foreground gives your photo a real sense of depth. That’s why a lot of photographers I have spoken to through the years have advised me to shoot my shots very wide – not zoomed in too tightly on the subject. This way, I can always crop out what I don’t need after the fact.

In this example, my good – and photogenic – friend Joe Farago posed for me on the terrace of a hotel in Phoenix, Arizona. With Joe in the foreground, I was able to give the background a little bit more emphasis so show just how grand it truly is.

The key to getting great photography is to continue to practice as much as you can. Experiment. Soon, you will get a feel for shot composition, and it will come as second nature.

Saturday, May 25, 2019

Accessorize!


No, this is not a call for all rookie photographers to wear the latest styles from the fashion runways in Milan …

Although I do have a snazzy leather cover for my Sony camera, gifted to me by my friend Dyami Plotke from the Penultimate Woodshop blog.

This is going to be a post about some of the more essential accessories you are going to want for your camera to make it even more useful. A smart outlay on a few crucial items will make your photography experience a much more pleasant one.

Tripod. You can shoot images without a tripod. Many photographers will never even touch one while they shoot. But, if you want to catch sharp images or you have time to set up for a shot, this is one crucial tool to have at your disposal.

No matter how still you may believe you are holding your camera, you are still breathing, your heart is still pumping, and everyone has just the slightest shake in their hands. By mounting your camera on a tripod, you eliminate that from your images.

I have bought several small, lightweight (cheap) tripods through the years, and believe me, they are a waste of money. I am now saving my pennies to get a professional quality model with a ball head, which allows you to adjust the camera to be level with your horizon line, regardless of how uneven the ground. Sure, they cost more than the cheap models, but as the old expression goes; Buy quality, cry once. Buy cheap, cry every time you use it.

Most cameras have a built in ¼ inch bolt hole that the tripod plate mounts into. No cell phones come with that. If you want that feature, do yourself a favor. Go to a dollar store and look for a selfie stick. Yes, the craze has ended, so you can find most of them being blown out at those locations. Specifically, seek out a model with a head that screws onto the stick. Once you unscrew that head, you will be surprised to find it will attach to your tripod, allowing you to mount your cell phone. 

An extra battery. Gone are the days when cameras used disposable AA or AAA batteries. Now, they use rechargeable models. They power everything on your camera, so it’s a wise idea to have a fully-charged spare ready to go before taking off on a long day of shooting. Don’t buy the cheapest cut-rate cells, either. Many of those don’t have the capacity to last more than a few short hours. Quality pays here. Rotate between the two batteries and keep them both fully charged so they get roughly the same amount of use. You will extend their life that way. And, when you are shopping around, if you look for a deal that combines a separate plug-in wall charger, you can save a ton of time by swapping batteries, having one getting juiced up while the other one is in the camera. 

Extra storage cards. Since digital photos are data files, they need to be stored somewhere. That data is squirreled away on something known as an SD card inserted into your camera. Large capacity cards can hold a lot of data, but it’s not a terrible idea to have a few spare cards on hand. This way, you can swap cards during your shoots and – in case the worst happens – save some of your photos should one of your cards fail. It has been known to happen.

There are also adapters that will allow you to plug your SD card into your computer at the end of a long day and download your photos for safe keeping. If your computer doesn't have one built in, pick up a card reader and tuck it in your bag. 

A camera sling. Most cameras come with a strap that you attach to the sides of the body and hang around your neck. They do an OK job of holding onto your camera, but, let’s be honest. If you are taking a walking tour of a city like New York, Boston or Chicago and shooting architecture, you are going to have a serious neck ache. Slings allow you to carry your camera across your body and have a connector that allows you to slide the camera up to view when you need it. An added bonus … if you are grabbing an amazing slice of pizza in Little Italy, the sling will keep the camera out of the way of the inevitable drips. Speaking of which…

Lens cleaner and a cloth. Anyone who wears glasses – of any kind – knows just how quickly lenses get dirty. The same goes for your camera. A quick spritz of lens cleaner and a wipe with a microfiber cloth will do wonders in helping you capture crisp, clean looking photographs.

Armed with these few accessories, you are better equipped to tackle your new hobby!

Wednesday, May 22, 2019

Your Controls: Aperture Priority and (Gulp) Manual


This time, we look at two other controls you will find on cameras that offer the operator the ability to change how the photo is taken.

Aperture Priority on a Canon
Aperture Priority: This allows the user to set the size of the opening on the lens while the camera’s controls adjust the shutter speed to ensure the proper exposure. Aperture size is expressed on cameras as the F Stop, with the lower number equaling a larger opening in the lens.

Why on earth would you want to adjust this? First, just as the pupils in your eyes widen in a dark room to allow more light to strike your retina, a wider aperture (lower F Stop) will allow more light into the camera to strike the sensor without running the risk of blurring as you would have by extending the time the shutter is open. So, with a wider aperture, you can shoot photos in a darker setting without having to resort to using the flash, making you less conspicuous. Think of shooting inside of a dark museum, concert arena or some other place. 

Another interesting thing changing your aperture can do is adjust your depth of field. This is a powerful tool for photographers to master.

Say you want to take a photo of something, but you don’t want everything to be sharp in the background. One way to do this would be to open your aperture (use a lower F Stop) and focus on your subject. By doing this, you can get a very sharp focus on what you are shooting, and the background items will become blurry, taking away from their focus and really encouraging the viewer to lock in on what you wanted them to see. This background blurriness, especially when done in portraits of people, is known by the Japanese word bokeh, and it makes your pictures look like a million dollars.

On the other hand, if you are shooting sweeping landscapes and you want everything to be in focus, from the nearby wild flowers to the mountains in the far distance, using a smaller opening (higher F Stop) will accomplish this task.  Your depth of field will stretch to near infinity.

There is a great pearl of wisdom that was given to all photojournalists when they were first hired at newspapers when it came to F Stops. “F/8 and be there.” Setting your camera to this middle-of-the-road F/8 gives you the ability to have a broad depth of field, allowing you to simply worry about getting your main subject in focus. Of course, with automatic mode on your camera, this may be outdated advice, but it still shows how crucial aperture settings are to getting that all important shot.

Manual Mode on a Canon
Manual: For many rookie photographers, here be dragons. When you engage manual mode, the camera’s computer turns control of both the shutter speed and the aperture size to you. By manipulating the settings, you can get some interesting effects, such as silhouetted buildings against a sunset, a very shallow depth of focus, whatever you desire. 

Keep in mind that back before the mid-1980s, every camera that had adjustable controls was – by default – in manual mode. Photographers had to study hard to understand which shutter speed went with which F Stop to capture the shot properly. They brought reference cards and cheat sheets with them so they knew how to adjust their cameras as lighting and shooting conditions changed.

They were also doing this in on film, so they had absolutely no idea until after it was developed if everything came out the way they wanted.  In fact, if you are interested in learning the details about shooting in manual mode, I would suggest going to your local library and checking out a book on photography. The older, the better. After all, they were written by the experts!

In the day and age of digital cameras, manual mode isn’t quite as intimidating. Photographers can look at the LCD screens on their cameras to see what they will get before they take the picture. And, if your test shots don’t look good, that’s fine. Just keep adjusting and snapping away until your pictures impress you.

Does this mean that professional photographers only shoot in manual mode? Absolutely not. Getting that shot is what’s most important. But, by getting to better understand the controls on your camera, you can take photos that go much beyond simple snapshots!

Tuesday, May 21, 2019

Your Controls: Automatic and Shutter Priority


The word photography comes from two Greek works – photos meaning light and the suffix graphy meaning to write. Yes, you are writing with light. Doesn’t that make it sound a whole lot more impressive now that you know the word’s origins?


This writing with light is accomplished  through a combination of how long your digital sensor is exposed to the light, how much light is let in and what your camera’s brain does with the image. To accomplish this, your camera has settings. Let’s look at some of the controls you will want to understand and master before you miss those beautiful shots. Two of the more common ones are:

Automatic Mode on a Canon
Automatic. Even the most expensive DSLR camera has this mode on it, and, for many of your photos, there is absolutely nothing wrong with shooting in automatic.

Seriously.

Your camera’s sensors look at the lighting, adjust for the type of light, how far your subject is from the camera and produces awesome shots that are clear and beautifully exposed. If you are going to Paris, you want to shoot at least a few of your shots of the Eiffel Tower on this mode. That way, you can prove you were there!
 
Check out that sunset!
On many cameras, automatic mode is made even more flexible with a menu of  presets which
enhance certain types of photos. Say you are staring at a gorgeous sunset, and you really want your camera to bring out the oranges in the sun’s dying rays. There’s a setting for that. Fancy a snap of your gourmet dinner? You betcha. A portrait of your son who is graduating high school? For sure. The camera will adjust its settings to emphasize certain features to enhance what you are shooting. Just read your camera’s manual and discover what presets your model has.

I once attended a PhotoShop conference hosted by Scott Kelby, a seasoned professional. He confessed that he takes many of his shots in automatic mode. If it’s a choice between capturing a fleeting moment of time or fiddling with the controls on your camera, err on the side of getting that shot.

There is nothing wrong with shooting in automatic mode! 

Shutter Priority on a Canon
Shutter Priority:  This is when you start to take control of your camera. In the shutter priority mode, you have your say of how long the shutter stays open. On modern cameras, the sensors will see what you are trying to do, and they will compensate by opening or closing the aperture – the opening in the lens that regulates how much light comes in (I will go into this more in the next post) – so your photo won’t be over or under exposed.

Why would you do this?  Think of it this way: faster shutter speeds freeze movement, while slower speeds allow light to hit the sensor for a longer time. 

Freeze the action
So, if you want to freeze the action of – say – your daughter chasing a soccer ball down the field. To capture the look of determination in her face, you can shorten the amount of time the shutter stays open down to something like 1/2000 of a second. Time stops. There is no blurring. Everything is crystal clear. Your camera makes the necessary adjustments to ensure that enough light falls on the sensor, and you have a great shot.

Take it to the other extreme – shooting fireworks on Independence Day. Did you ever wonder just how photographers get those beautiful, sparkling streamers? They slow their shutter down to three or four seconds per shot!

During that time, the fireworks bloom and their brilliant light traces patterns across the sensor, giving them that signature look.  Since the camera’s shutter is open for so long, it’s crucial that the camera be mounted on a tripod so there will be no shaking. Yes, if your hands jitter – even a little – you will not be happy with the results.

What about aperture priority or – gasp – manual mode?  We’ll look at those in the next post.


Monday, May 20, 2019

All in the Families


So, which camera is right for the rookie photographer?

I will focus on four different types – or families – to choose from. And, selecting the right one can be a real challenge.

I will let you know right up front that there will be a few I won’t cover in this blog post.

First are any cameras that use film. Yes, you can still buy film and and have it processed, and manufacturers are still making film cameras. If you want a less expensive route to get into film photography, look at sites such as eBay to find high quality vintage cameras that sell for a fraction of their original cost.

I also won’t go into the action-type camera such as the GoPro. Those are awesome cameras for capturing your skydiving or scuba adventure, but they don’t offer the flexibility that a hobby photographer needs.

This leaves us with four families of cameras to choose from:

Point and Shoot. These pocket-sized cameras are easy to click away with. As their designs have evolved, manufacturers have added professional features such as optical zooms, more advanced controls and improved photo sensors. These are very affordable; however, they do have a few drawbacks. They limit the user to the one installed lens, which does a fairly good job. But, if you want to zoom beyond the camera’s limits, or that lens gets damaged, you are out of luck. Their image sensors are smaller than what are found in other cameras, meaning that printed enlargements may look pixelated.

Digital Single LensReflex (DLSR) cameras. These cameras are direct descendants of the Single
Lens Reflex (SLR) film cameras that preceded them. One of the greatest challenges faced by early camera designers is that the camera’s eyepiece was offset from the lens, meaning that you never truly took a photo of what you were seeing. You also had to guess if the viewfinder and the lens were both in focus. By using a series of mirrors, the SLR mechanism takes the image directly from the lens and reflects it to the user’s eye. Once you have everything the way you want it and press the shutter release, the mirror flips out of the way with a signature click, allowing the light to travel down the lens onto the film – or, in the case of the DSLR – onto the digital sensor.

Since the digital versions of the cameras use the architecture of their film-based models, manufacturers simply configured the camera bodies to accept their existing suite of lenses. Accordingly, these cameras can use the specialty lenses perfected through decades of research.

Mirrorless Interchangeable Lens Cameras (ILC). With digital sensor technology, camera manufacturers began to wonder if the complex reflex mirror mechanism was truly necessary. Why not combine the ease of a point and shoot with interchangeable lenses? Thus was born this new family of cameras. The complex mirror system is eliminated because the image is projected directly to the digital sensor, and, the photographer sees exactly what the camera will shoot on an LCD screen at the back of the camera. Want a different look? Use a different lens or change your settings. 

One of the knocks on this type of camera is that because there is no visual viewfinder, it may be difficult to see the preview image in bright light. Plus, only a few manufacturers – namely Sony – have embraced this newer format. More established brands such as Canon and Nikon have stayed with their more traditional DSLR formats, and professional photographers are used to the larger SLR format.

Cell Phones. I am counting these as a separate family of cameras because they are not quite the same as their point and shoot cousins. They have come a long way since they were first introduced in Japan back in 2000. Apple, Samsung, Google, LG and their competitors are reinventing the way images are taken and how they are processed in the camera. Digital manipulation is making up for the phone’s shortcomings in optics, allowing for images which appear in many ways to be equal to – if not superior – to those taken on more traditional cameras with glass lenses. They also allow for immediate sharing of photos through  cellular or WiFi networks. While these cameras are handy, the user must ensure that the lenses stay clean to get the sharpest image, and a lack of a tripod mount can cause the camera to shake in low light conditions.

While your choice of camera is important, learning how to use the features is crucial to getting great results.

Remember, practice makes perfect!

Sunday, May 19, 2019

Capturing the Vision


When did the photography bug hit me?
A 110mm camera just like the one I had
It might have been when my parents got me my first 110mm camera for Christmas back in 1977. It was a flat camera that I could tuck into my pocket, ready to shoot whatever I saw. Built-in flash. Auto focus. No difficult controls to master. Just point and shoot. Loaded with a roll of 24 exposure film, I was ready to make my mark on the world of photography.
How did people even fit in a Fotomat booth?
There were a few hurdles that had to be overcome. First, I couldn’t see if I got the shot I wanted, because I had to wait for the film to be developed. Yes, there was a place called Fotomat you could drive to, drop off the film, and wait a few days for the developed prints to come back. Do you have any idea how long a few days seems to a nine-year old child?  

The pictures never really looked that good, either. The film format was so small that everything came out grainy. The flash was wimpy. There was no zoom, so everything was shot so wide, you had no idea what you were looking at.
With these results, my dreams of becoming a photographer were put on hold. For about 40 years.
During that off time, cameras developed. Every year, more features were added, and every year, the prices would drop.
Instagtram is a great place to share photos
Professional 35mm film came to consumer-grade cameras. This was followed by digital cameras where you could see what you had immediately after you snapped the shot.  Zoom became a standard feature, so you could get up close to your subject without having to get directly on top of it. Tripod mounts became di rigeur, allowing photographers the opportunity to get sharp photos in dim light without relying on a flash. Social media sites such as Instagram have opened the photographer’s virtual gallery to share his or her work not just one print at a time to family and close friends, but to thousands of other enthusiasts across the world.

My Sony A5000
In 2015, I picked up a Sony Alpha 5000 interchangeable lens compact body camera loaded with the features you would have seen on much more expensive models just a few years earlier. With that camera – and the improved cameras that came with my cell phones – the fire in my belly was reignited.
Was it intimidating, trying to learn about camera controls? Of course it was. There were dozens of blurry, out of focus shots that never saw the light of day, banished forever to the digital trash bin. In the digital world, that’s absolutely fine, because there is no cost to experiment. To try new things. To get out of your comfort zone.
The shot that impressed me most
How did I know the first time I got a great shot? It was easy. I downloaded one day’s worth of shots onto my computer and expanded them on my monitor. There was a photo of the Chrysler Building in New York City, captured during a night snowstorm. It was a well composed, properly exposed shot – wow. I sat in amazement, looking at what I had done with a stock lens on a modestly-priced camera.
And, I was proud of what I had captured.
Happy little trees!
On this blog, the Rookie Photographer, please join me on my journey into this brave new world. Have I made mistakes? Plenty. Have I learned from them? You bet. Are there many more lessons to be learned? Absolutely.
But, as my TV idol Bob Ross said on his PBS show The Joy of Painting, “talent is a pursued interest. Anything you are willing to practice, you can do.”
Won’t you join me as we discover this fascinating world of photography together?